SIEM with ELK
Hey guys, This tutorial is for people who are wondering how to create a SIEM with Elastic search, logstash and kibana. Elastic team have recently launched Elastic SIEM. “At the heart of Elastic SIEM is the new SIEM app, an interactive workspace for security teams to triage events and perform initial investigations”.
The main reason I am putting togther this blog/tutorial is beacuse of the lack of a blog/tutorial that explains how to install ELK (most of the blogs ask you to purchase ELK installed cloud provider).
So, What is SIEM?
It is simply a central log repo that enriches the logs and assist threat detection.
what are the use case: • Threat detection, • Incident Response
Elastic search as a SIEM
• Collects, indexes, and stores high volumes of logs, • Functional visualizations and dashboards, • Reporting and alerting
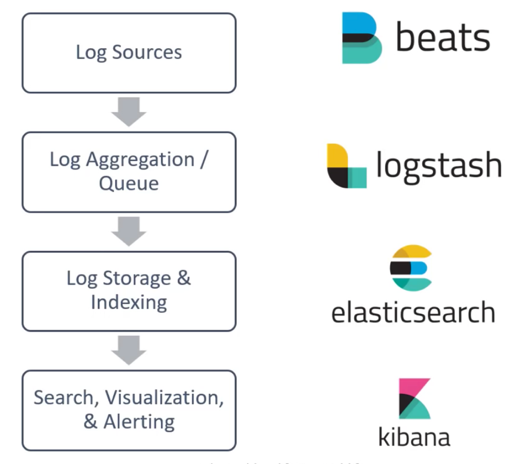
The different components of the ELK Stack provide a simple yet powerful solution for log management and analytics.
Before I start, I used an Ubuntu Server 18.04 LTS on a m4.large memory. If you have any firewall in place ensure to enable access from anywhere using SSH and TCP 5601 (Kibana) & 9200(Elastic Search)
INSTALLING ELK
ELK can be installed locally, on the cloud, using Docker and configuration management systems like Ansible, Puppet, and Chef.
Installing Elasticsearch
First, you need to add Elastic’s signing key:
wget -qO - https://artifacts.elastic.co/GPG-KEY-elasticsearch | sudo apt-key add -
Install apt-transport-https package
sudo apt-get update
sudo apt-get install apt-transport-https
Add the repository
echo "deb https://artifacts.elastic.co/packages/7.x/apt stable main" | sudo tee -a /etc/apt/sources.list.d/elastic-7.x.list
To install a version of Elasticsearch that contains only features licensed under Apache 2.0 (aka OSS Elasticsearch):
echo "deb https://artifacts.elastic.co/packages/oss-7.x/apt stable main" | sudo tee -a /etc/apt/sources.list.d/elastic-7.x.list
Now install ES
sudo apt-get update
sudo apt-get install elasticsearch
Update the yml file with these fields:
sudo nano /etc/elasticsearch/elasticsearch.yml
network.host: "localhost"
http.port:9200
cluster.initial_master_nodes: ["<PrivateIP"]
Run the service:
sudo service elasticsearch start
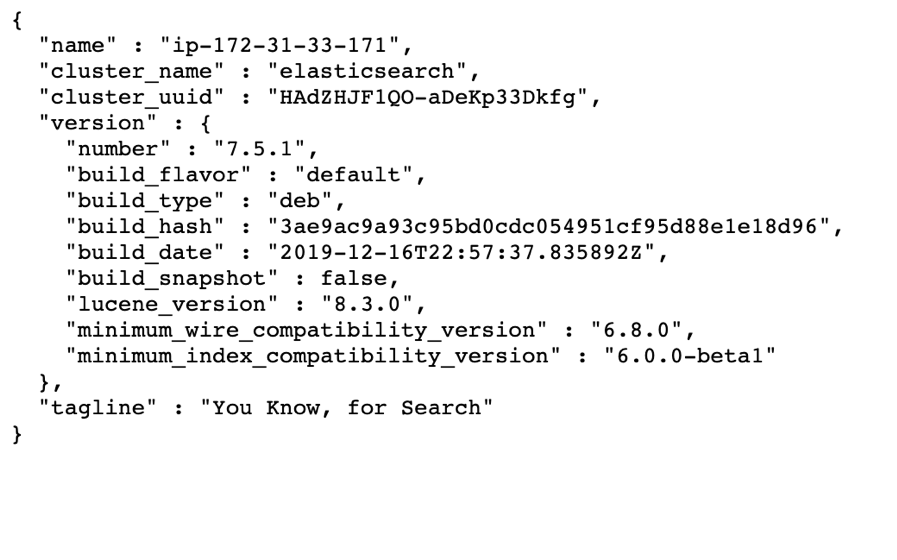
Open http://localhost:9200 to make sure everything works as expected
Installing Logstash
Logstash requires Java, verify java is installed:
java -version
if not,
sudo apt-get install default-jre
Install Logstash:
sudo apt-get install logstash
Installing Kibana
install Kibana:
sudo apt-get install kibana
Configure kibana configuration file /etc/kibana/kibana.yml :
server.port: 5601
elasticsearch.url: "http://localhost:9200"
These specific configurations tell Kibana which Elasticsearch to connect to and which port to use
sudo service kibana start
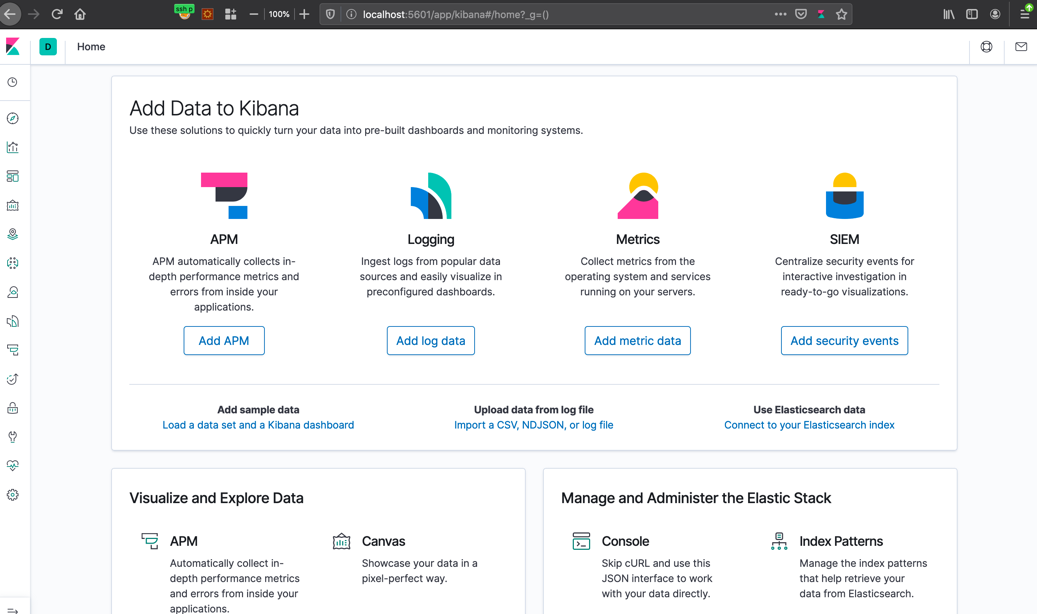
Open up http:localhost:5601 to see Kibana working.
Installing Beats
There are various beats available, installing a beat depends on your organizations need. The different beats available are: Filebeat, Metricbeat, Winlogbeat, Auditbeat
Eg: Metricbeat will begin monitoring your server and create an Elasticsearch index which you can define in Kibana.
For demo purpose, I will be installing audit beat
deb:
curl -L -O https://artifacts.elastic.co/downloads/beats/auditbeat/auditbeat-7.5.1-amd64.deb
sudo dpkg -i auditbeat-7.5.1-amd64.deb
rpm:
curl -L -O https://artifacts.elastic.co/downloads/beats/auditbeat/auditbeat-7.5.1-x86_64.rpm
sudo rpm -vi auditbeat-7.5.1-x86_64.rpm
mac:
curl -L -O https://artifacts.elastic.co/downloads/beats/auditbeat/auditbeat-7.5.1-darwin-x86_64.tar.gz
tar xzvf auditbeat-7.5.1-darwin-x86_64.tar.gz
brew:
brew tap elastic/tap
brew install elastic/tap/auditbeat-full

This installs the most recently released default distribution of Auditbeat. To install the OSS distribution, specify elastic/tap/auditbeat-oss.
linux:
curl -L -O https://artifacts.elastic.co/downloads/beats/auditbeat/auditbeat-7.5.1-linux-x86_64.tar.gz
tar xzvf auditbeat-7.5.1-linux-x86_64.tar.gz
docker:
curl -L -O https://artifacts.elastic.co/downloads/beats/auditbeat/auditbeat-7.5.1-linux-x86_64.tar.gz
tar xzvf auditbeat-7.5.1-linux-x86_64.tar.gz
Once you have auditbeat installed, configure the file : /etc/auditbeat/auditbeat.yml to set the connection information:
output.elasticsearch:
  hosts: ["<es_url>"]
  username: "elastic"
  password: "<password>"
setup.kibana:
  host: "<kibana_url>"
Start audit beat:
sudo auditbeat setup
sudo service auditbeat start
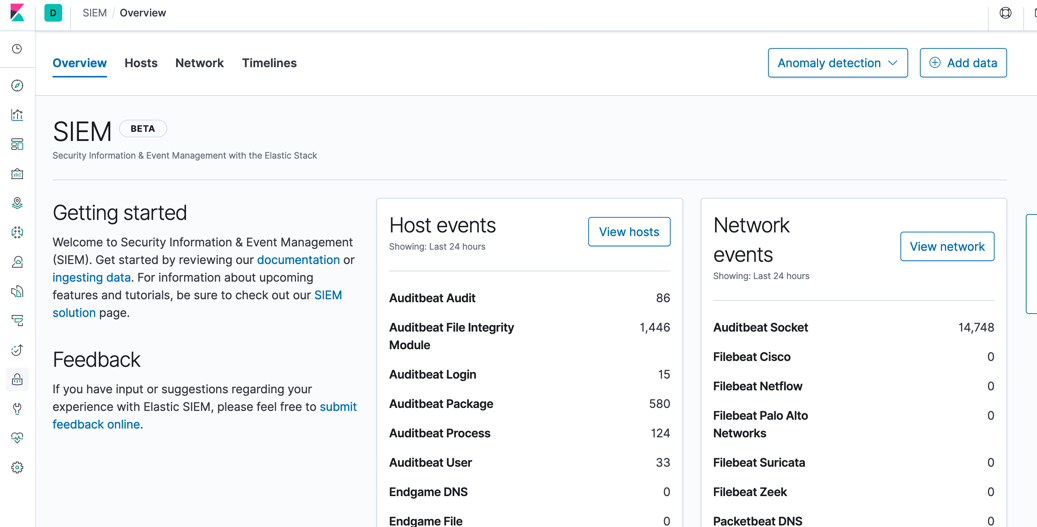
Now you can successfully SIEM away for free :)